
Before you start
- The client needs to be in your client list.
- Notes are freeform. There are no note templates. Each note has a title and a body.
Steps
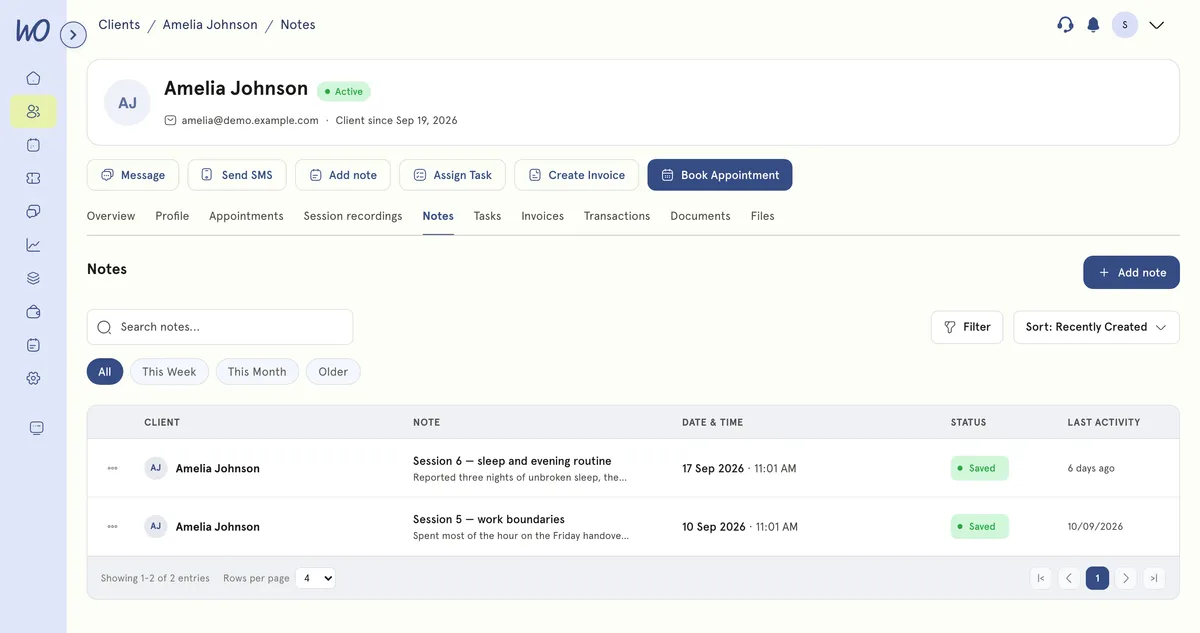
- Go to Clients and open the client.
- Select the Notes tab. The Add note button in the client’s header also takes you here.
- Select Add note.
- Type a title in the Title field.
- Write your note where it says Write your note here…. The toolbar along the bottom has bold, italic, underline, lists, links and images.
- Select Save. You’ll see Note created. Discard closes without saving.
You need both a title and some note text to save.
What happens next
Your note appears on the client’s Notes tab with the date and time and a Saved status. You can search by title, or filter by This Week, This Month or Older, and sort with Sort: Recently Created.
To change a note, open the menu on its row and select Edit. Make your changes, then select Save. The Last Activity column then shows Edited.
To remove a note, select Delete from the same menu, then confirm with Delete.
Good to know
- Your client can’t see your notes. Only the practitioner who wrote a note can see it.
- In a video session, use the Session notes panel on the right of the call. It saves as you type. The note is linked to that appointment and appears on the client’s Notes tab afterwards. Your client doesn’t see this panel.
- If you close the editor with unsaved changes, you’ll be asked to confirm. Select Keep editing to go back.
- Notes added from Toolkit → Notes are kept separately. They don’t appear on the client’s Notes tab.
- AI Notes is a separate, paid add-on that records a session and drafts a note for you to review.