
Before you start
- Each file must be 50MB or smaller.
- Files use your practice’s storage allowance.
Steps
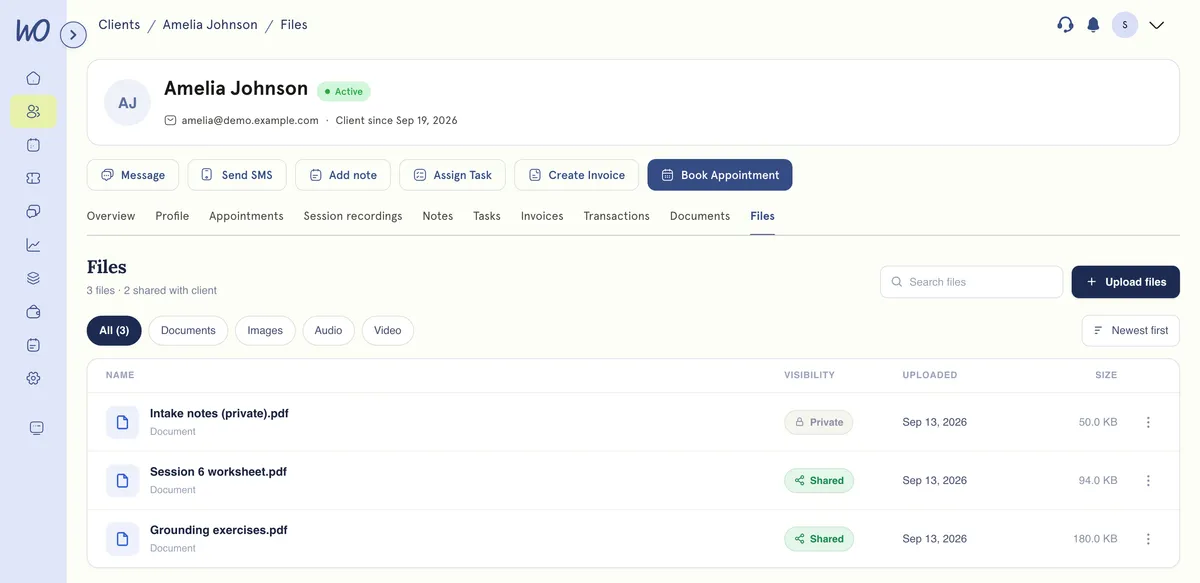
- In the sidebar, select Clients and open the client.
- Select the Files tab.
- Select Upload files. The heading above tells you how many files there are and how many are shared with the client.
- For each file, check the File name.
- Under Visibility, choose Private to you or Shared with client. Files start as private.
- Select Add more to add further files.
- Select Upload.
What happens next
Shared files appear in your client’s portal under Files. They can view and download them there. Private files are Only visible to your practice.
Good to know
- To change visibility, select the Shared or Private label next to a file. Or open the file with Preview and select Share or Make private.
- The row menu also has Download, Rename and Delete.
- Use the filters to narrow the list: All, Documents, Images, Audio and Video. You can also use Search files.
- Files over 50MB are skipped.
- If you run out of storage, the app tells you and the upload stops.
Troubleshooting
A file didn’t upload. Check its size. Anything over 50MB is skipped, and you’ll see “Some files are over the 50MB limit and were skipped.” Compress it or split it. If your storage is full, the app tells you and the upload stops.
The client can’t see a file. Check its visibility. If it says Private, select the label to switch it to Shared. It appears in their portal straight away.