
Before you start
- Theme changes apply to every page of your site.
- If you want to use your own font, have the file ready as TTF, OTF, WOFF or WOFF2, under 5 MB.
Steps
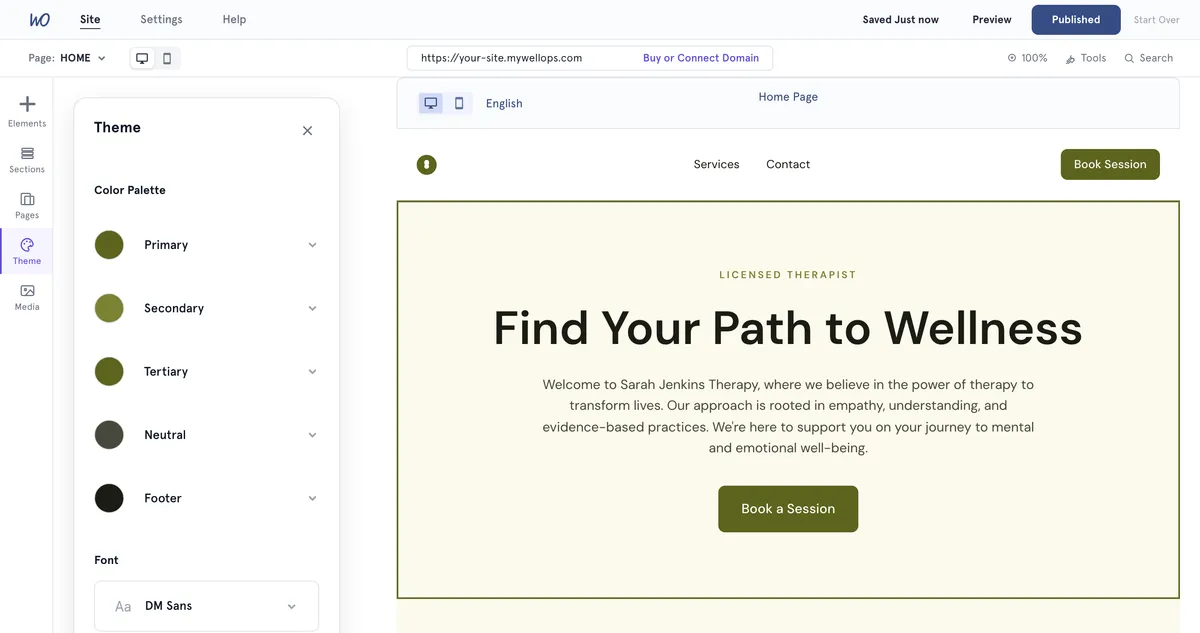
- Open your site in the Website Builder. On the bar on the left, select Theme.
- Under Color Palette, select a colour — Primary, Secondary, Tertiary, Neutral or Footer. Pick a new shade, choose a swatch, or type a code in Hex.
- Under Font, open the list and choose a font. Use Search for a font to find one. The font is used for headings, body text and buttons.
- Under Corner radius, choose Square, Subtle, Rounded or Pill. This sets how rounded buttons and cards are.
- Select Preview at the top to check the result, then Publish when you’re happy.
Add a Google font
- Open the font list and select Add Font. The Add font window opens.
- On Google font, search for and select the fonts you want, then select Add selected.
- Open the font list again and choose the new font.
Upload your own font
- Open the font list and select Add Font.
- Select Custom font. Under Upload your font, choose your file.
- Select Done, then choose the font from the list.
Good to know
- Your changes save as you go and stay in your draft until you select Publish.
- Footer sets the footer’s background colour. You can also change it from Sections → Footer. See Change your website header and footer.
- Each section can also have its own background, set in Edit Section. See Edit sections on your website.
- Fonts you upload count towards your storage.
- Your website’s logo is set in Settings → Website Info, not here. See Set your website’s logo, title and description.
- The logo, colour theme and font in Practice Hub → Platform customization brand the MyWellOps app itself. They’re separate from your website’s theme, and changing one doesn’t change the other.
Troubleshooting
My font upload was refused. Check the file is TTF, OTF, WOFF or WOFF2 and under 5 MB.
My live site still shows the old colours. Theme changes only go live when you select Publish again.