
Before you start
- Have your logo ready as a PNG, JPG, SVG or WebP file under 5 MB.
Steps
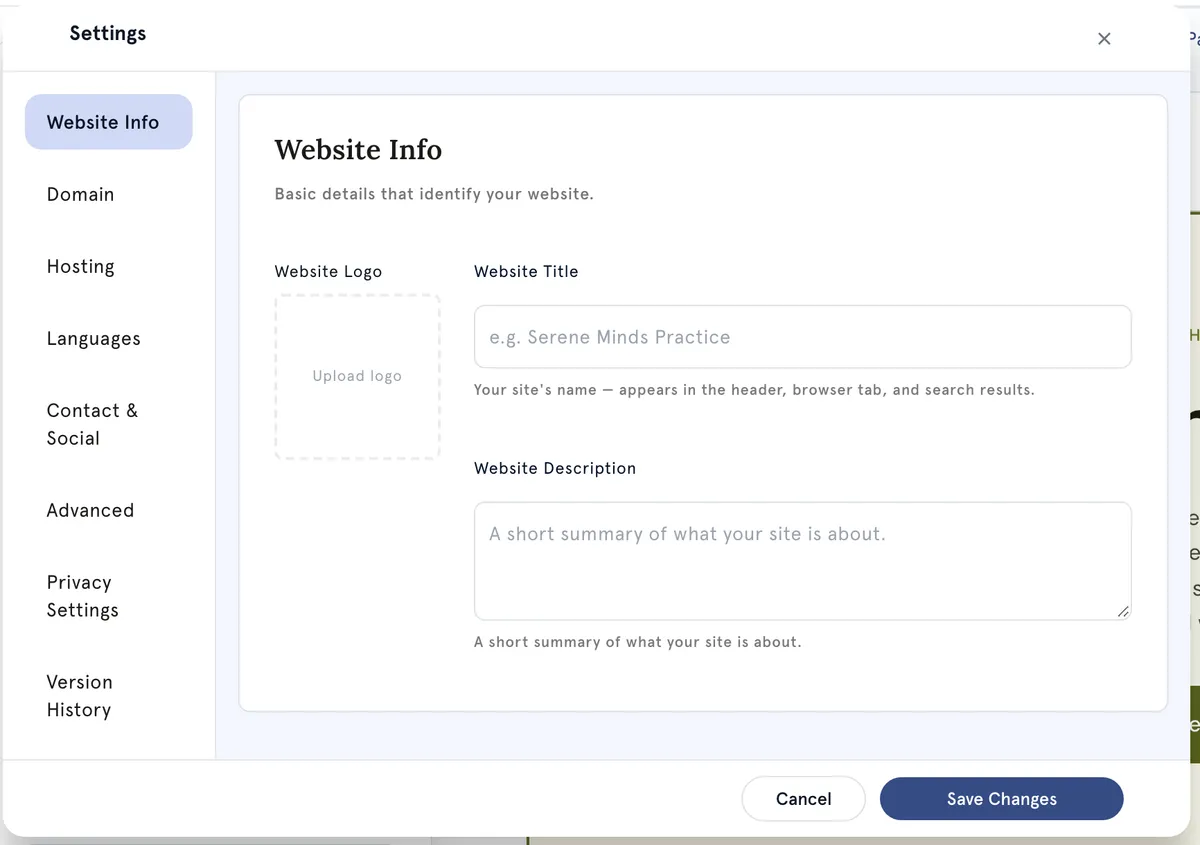
- Open your site in the Website Builder and select Settings at the bottom of the bar on the left.
- Website Info opens first.
Add or change your logo
- Select the Website Logo box (Upload logo), or Change if you already have one. You can also drag a file onto the box.
- The Adjust logo window shows your logo in the header and footer. Choose a size for each — S, M, L or XL.
- Select Save. You’ll see Logo saved.
To resize a logo you’ve already added, select Adjust size under it.
Set your title and description
- In Website Title, type your practice or website name.
- In Website Description, write a short summary of your practice, up to 300 characters.
- Select Save Changes. You’ll see Website info saved.
- Select Publish in the editor to put the changes live.
Where these appear
- Website Title: in your site’s header, in the browser tab, and as the title in search results and when your link is shared.
- Website Description: in search results and when your link is shared. Your footer also uses it if you haven’t written a footer description.
- Logo: in your site’s header and footer, unless you’ve added a separate Footer logo.
Good to know
- Nothing here goes live until you select Publish again, even though it’s saved.
- If you clear the Website Title, the header shows no name at all. If you’ve never set one, the header uses your practice name.
- To check how your logo looks in the header, open Sections → Header. The Logo box shows what’s saved.
Troubleshooting
My logo won’t upload. You’ll see “Please upload a valid image file (PNG, JPG, SVG, or WebP)” or Logo image must be under 5MB. Save the logo in one of those formats, or make the file smaller.
My live site still shows the old title or logo. Select Publish again. Settings only reach your live site when you publish.